Archive | June, 2012

Camelina Honey Dip for Bread

30 Jun
by Deanne

Check out this simple way to enjoy fresh bread.

I thought the nutty taste of camelina oil and the sweetness of the honey wonderfully complimented fresh sourdough bread.

Camelina Honey Dip for Bread

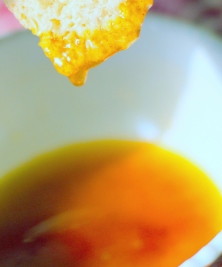
Ingredients:Photo of Camelina Honey Dip for Bread
  • 1 Tbsp camelina oil (buy it online or look for it at MN co-ops)
  • 1 Tbsp honey
  • 1/8 tsp cinnamon
  • pinch of salt
Directions:

Mix ingredients together in a bowl and serve with small pieces of bread.  You may need to mix the oil and honey together again as it tends to separate when it sits for awhile.

Do you have a favorite dip for bread?  Check out when Francine unexpectedly discovered a yummy dip for fresh bread.


Easy as 1, 2, 3: Basil Mayo

27 Jun
by Deanne

For one of our recent FarmerChef specials we paired cute little sourdough wheat slider buns with an interesting Italian sausage made of locally sourced lamb and spices. It might be a bit of a challenge to duplicate this lamb sausage slider at home, but you can easily whip up what we put on the sliders.

A photo of the sliders with Basil MayoWe blended together mayo, basil, and red wine vinegar…a perfect and easy way to kick up a salad or sandwich.  And since this recipe is mix as you go, you won’t have to worry about what to do with a jar full of leftovers. It works really well if you have your own basil plant close by.

1.  Select one basil leaf:  mince with knife on cutting board.
2.  Measure 1 tablespoon of mayonnaise into it a small bowl.
3.  Add 1/2 teaspoon red wine vinegar.  Mix all ingredients together and spread on any sandwich you choose!

This simple recipe makes enough for two sandwiches.

Do you use herbs to amp up the flavor of simple foods like sandwiches?

Putting Up Snow Peas and Green Beans

26 Jun
by Deanne

I am developing my FarmerChef skills by learning (or re-learning) how to process our green beans and snow peas.

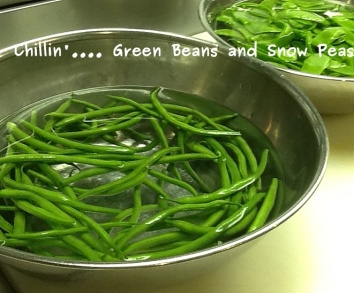
When I was a kid, I used to help my mom blanch and freeze green beans, but given the amount of time that has passed,A photo of the beans and peas I don’t really remember how we went about the process.  So I turned to the internet for help.  I discovered that there are many opinions on the correct way to put up beans.

One minute in hot water or five?  Hmm…for me, I decided on 1.5 minutes. Why?   I like to eat my veggies less cooked with some crunch!

All the “experts” on the internet agreed that I should put the beans/peas in a ice water bath after I blanched them.  Done!

A few bags now sit in our freezer, ready for a time when we’re hungry and they aren’t growing on the vine.

How do you go about learning how to store real food, grown in your own garden or purchased at the farmer’s market?

A Visit to Moonstone Farm

21 Jun
by Deanne

A few years before we owned a restaurant, I facilitated a business meeting at a coffee shop called Java River in Montevideo, MN. After the meeting, the client encouraged me to come downstairs and enjoy lunch. I learned that the coffee shop served locally raised grass fed beef from a farm called Moonstone.

I’m not sure why that random fact stuck in my mind, but perhaps it’s because Steve‘s always been interested in feeding cattle on grass because during his previous career as a cattle buyer he’d grown a little uncomfortable with the way the cattle business has boomed and grown.

Recently I remembered Moonstone and when I looked up the farm I discovered that they have a “farm stay” element to their business, which is modeled after the owners’ experience with agritourism in Europe.

The time seemed right for us to go and learn more about their operation. We learned that they have interns, something we’d like to consider incorporating into our growing and evolving restaurant operation.

A photo of our breakfastOur accommodation was a very sweet one room cottage that has been re-purposed from its former life as a brooder house. Our breakfast was a great display of their farm’s abundance. We had elderberries on our melons, farm fresh eggs, and pear juice from last year’s harvest.

After breakfast we took a walk through the woods with one of the owners, Audrey, who is a student and teacher of holistic management and permaculture design.  She showed us the progress they are making in transforming a patch of forest on their land to an edible and sustainable forest.

Before we left we stopped in their farm store and picked up some items that will soon be showing up in our FarmerChef recipes.

Have you ever stayed at a farm for a short get away or vacation?

A Strawberry Rhubarb Frozen Treat…3 Ways

19 Jun
by Deanne

When we lived in Philadelphia, we met water ice.  It was love at first frozen bite.  If you’re from another area of the East Coast, you might call water ice ‘Italian ice.’ Italian ice is different from ice cream and sherbet because it’s free of dairy.  And it’s different than shaved ice because the flavors are frozen in the ice instead of just dumped on top.  One common way of having Italian ice is to have it with thick frozen custard, this combination is confusingly referred to as gelato (which is an Italian style of ice cream).  Okay, so I think I’ve caught you up on all of the water ice terms. ;)

With water ice on the mind and warm temperatures outside, I’ve been experimenting with rhubarb. strawberry, water and honey, to see if I could re-create a treat similar to Italian ice. 

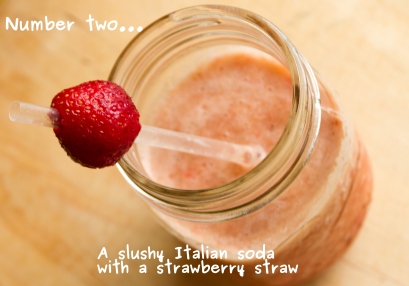
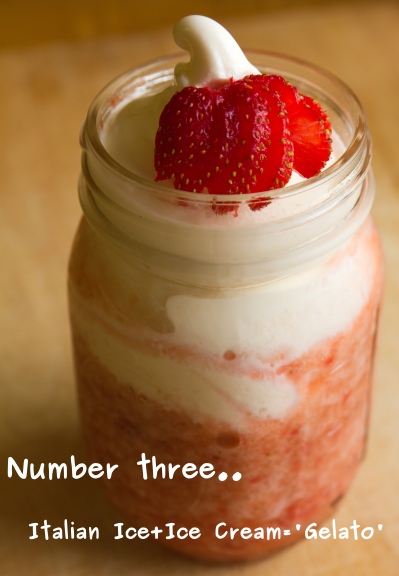
Well, I think I did it!  Last week we served up three icy treats at our restaurant. We had straight up Italian ice, soda water mixed with Italian ice for a slushy Italian soda and ice cream+Italian ice for a ‘gelato’ type of treat.A photo of Italian iceA photo of Italian ice sodaA photo of ice cream and italian iceThe recipe is still very much a work in progress, so I won’t share it here, but I will tell you what we did.  We cooked the rhubarb until is was a thick applesauce-like sauce. Then we added some vanilla, a little salt and honey. We also added mashed up fresh strawberries.  The trick is to get the sugar content higher than the water content so that it doesn’t freeze solid.

Are you staying cool this June?  Have you ever had Italian ice?  If so, what’s your favorite flavor. 

If you haven’t yet experienced Italian ice, we hope you’ll b able to do so sometime….Rita’s, a franchise that started outside Philly and serves Italian ice, has locations in many states.  Or you can always stop by Solar, the next time we freeze-up a batch!

PS…Thanks Luke for the great photos!

Yikes! We Have Thrips!

18 Jun
by Deanne

Before my Saturday morning cup of tea this conversation happened between Steve and I.

Steve:  We have thrips.

Me:  That sounds bad, really bad.  What are thrips?

When we set out to grow a few crops in our raised bed gardens, we knew that there was a strong possibility of bugs and other pests finding a home among our plants. But Steve didn’t want to rely on chemicals for pest control. He wanted to take a more organic approach and see how the plants grew and what issues came up before attacking the vegetable patch.

Now we know that thrips like our bean plants.  Like all things in life, the good (fresh vegetables for our FarmerChef creations) sometimes comes with the bad (pests that want a bite of our crop too!) but luckily we’re able learn and A photo of thripsadapt as we go…figuring out a way to turn bad to good.

During this chapter of our journey, we are learning that tiny thrips survive by puncturing a plant and sucking up the contents.  These hungry guys are known by some other names, some of which are bit more poetic…corn lice, thunderbugs, thunderblights and my favorite, thunderflies—not to be confused with thunder thighs, a different kind of pest…caused by not enough exercise for my flabby legs. ;)

Our first plan of attack is to spray a homemade insecticidal soap. Steve sprayed it on this morning.  From everything we are reading, we’ll have to apply it more than once.  And so our battle with thrips commences.

Francine, beware, according to this BBC article they are found in the UK too.

Have you ever had thrips?  Do you have any tips for getting rid of them?

A Berry Good Day

14 Jun
by Deanne

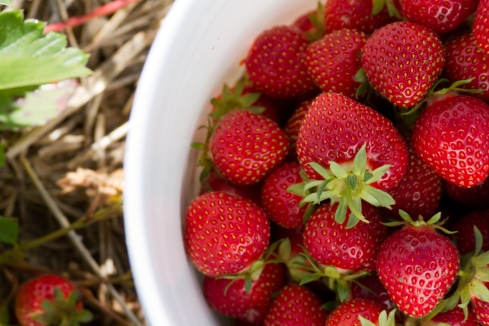
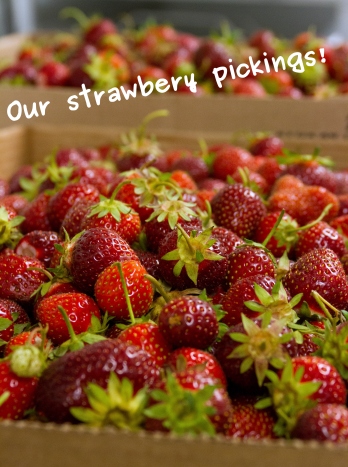
On a lovely sunny, but not hot, June morning three generations of our family (myself, son Luke [photographer and video-maker] and my in-laws)A photo of the strawberry field loaded as many plastic containers as we could find into the car and drove southwest until we turned right on a road appropriately called Berry Lane.

While the four of us have varying degrees of strawberry picking experience, we quickly got to work and began picking all the strawberries from our assigned row.  We couldn’t help but smile and dream about all the things we’re hoping to make with our strawberry bounty.A photo of the strawberries

It was our day off from restaurateur-ing, but not from preparing great food. When we returned, we blew the dust off of Mary’s best gluten-free waffle recipe and whipped up a delightful reward for all of our berry picking efforts. We let Steve, who stayed back to do a few restaurant chores, share in our brunch as well.;)

Oatmeal Waffles

Recipe  from GF Harvest with our adaption notedA photo of the waffeles
Ingredients:
  • 1 ½ cups gluten free flour blend (we used a blend of brown rice+potato flour+xanthan gum, but you can use your preferred gluten free flour blend)
  • 1 cup gluten Free rolled Oats
  • 1 Tbsp baking powder (we used ¾ Tbsp based on past experience)
  • ½ tsp cinnamon
  • ¼ tsp salt
  • 2 eggs, slightly beaten
  • 1 ½ cups milk (we used soy milk to make it dairy free)
  • 6 Tbsp butter, melted (we used canola oil to make it dairy free)
  • 2 Tbsp brown sugar
Directions:

In large mixing bowl, stir together all dry ingredients.

In a separate bowl, mix eggs, milk, butter, and brown sugar. Add to dry ingredient and stir until blended.

Bake in lightly-greased waffle iron until golden brown.

We served these waffles loaded with our freshly picked strawberries cut into chunks.

A photo of the strawberriesRelaxing after this breakfast treat, my ambitious and very busy twenty-something son said, “I want more days like this in my life.”

Well said Luke!

In this ReaLocal Cooking journey that Francine and I have undertaken, I’m starting to realize that slowing down and preparing delicious wholesome food together as a family is the best form of entertainment.

At times like this, we all miss Francine. Thank goodness for our ability to imagine…I can already picture the day we’ll discover a local treat and prepare it together when we visit them in England this fall.  Until then, this day was berry good.

Have you been strawberry picking?  Do you have plans to pick some strawberries this June? Any ideas about what you’d like to prepare with the berries?

What does an artichoke plant look like?

13 Jun
by Francine

This weekend we stopped by Ham House for a wander around the grounds, despite the drizzle.  We also spent some time carefully inspecting all the plants growing in the kitchen garden.  They use what’s grown in the garden in Orangery Café, which is right next to the garden.

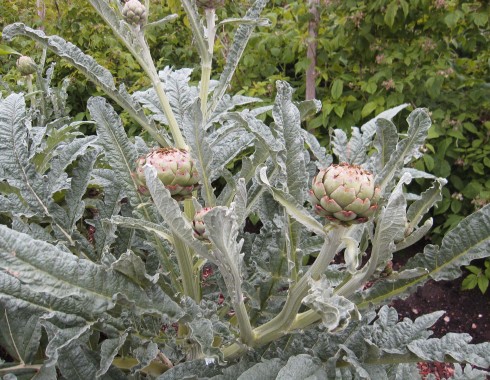
As we were wandering the rows of the kitchen garden, I spotted a giant dinosaur-like plant in the distance; and I thought, ”Whoa…Now that’s a giant thistle!”  But then when got closer I realized that it wasn’t a genetically modified form of the prickly purple thistle that all farmers loathe—it was actually a globe artichoke!  Photo of artichoke plant

I’d never seen an artichoke plant before, have you?  It’s cool to see how things grow because so often we just find things clean and shiny on our supermarket shelves.

When I got home and wikipedia-ed ‘artichoke,’ I discovered that in fact artichokes are perennial thistles!  The part of the artichoke that we consume is the bud; if it’s allowed to flower it produces a large purple bloom.  Ya’ learn something new everyday! ;) 

I’ve actually never eaten an artichoke(!!) but I’ve thought it looked fun…like eating a flower, which it is since you consume the pre-flower.  Do you have a favorite way to eat artichokes?

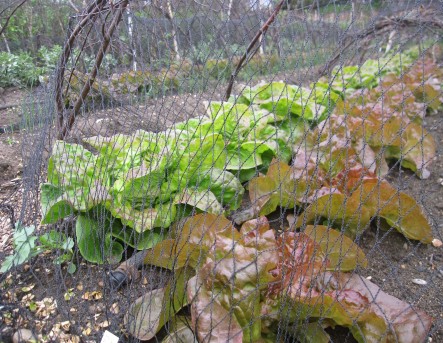
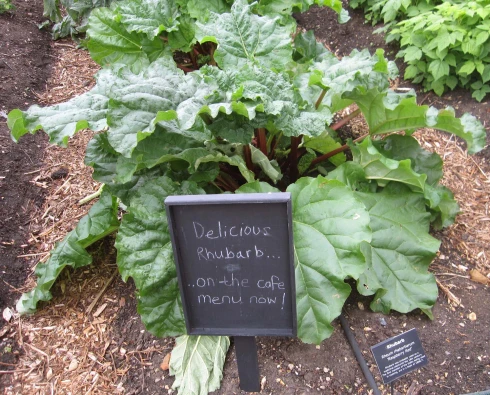
Here’s a few of the other lovely things we found amongst the rows of the kitchen garden.A photo of the lettuceTheir lettuce looks amazing and it’s nicely protected from ninja rabbits.  It’s also A LOT bigger than the lettuce growing on my balcony.A photo of the rhurbarbThere was lots of lovely red rhubarb.  We didn’t visit the cafe, but I’d love to know what they were making with it. (I made this with rhubarb last week.)A photo of a lovely flower

And this flower brought some sunshine to our dark gray weekend.

Rhubarb Camelina Streusel Scones

12 Jun
by Deanne

Recently Francine and I discovered that we’ve both been baking in the middle of the night…and both of us have been baking treats with rhubarb!

First I made Rhubarb Streusel Muffins using Smitten Kitchen’s recipe. I made a few changes in the streusel  portion of the recipe because I wanted to see what it would be like to use Omega Maiden Camelina Oil instead of butter.  I also like walnuts so added nuts.

I liked the way the streusel with camelina oil turned out so I decided to use it in my favorite (and very adaptable) scone recipe. The unique taste of the camelina oil got along well with the sweet seasonings and nicely complimented the tart rhubarb.

Camelina Streusel  for Rhubarb Streusel Muffins and Scones

  • ½ cup all purpose flour
  • 1 Tbsp sugar
  • 3 Tbsp brown sugar
  • ¼ tsp cinnamon
  • a pinch of nutmeg
  • a pinch of salt
  • 2 Tbsp camelina oil (buy it here)
  •  ¼ cups nuts, coarsely chopped

Mix together. I set aside one third of the streusel to mix into the muffins and I used the rest to top the muffins before baking.  You can also use this streusel in the same way, but to make scones instead of muffins (see recipe below).  Also, try using any leftover streusel on your morning oatmeal or even as ice cream topping!A photo of the Rhubarb Camelina Streusel Muffin

Here’s the scone recipe I created by adapting our basic scone recipe so that I could use streusel and fresh rhubarb.

Rhubarb Streusel Scones

Ingredients:
  • 2 cups flour (whole wheat or all purpose work well)
  • 2 tsp baking powder
  • ½ tsp salt
  • ½ cup brown sugar
  • ¾ cup streusel mixture (see recipe above)
  •  1 cup rhubarb,  cut into ¼ inch pieces
  • 1 cup sour cream (recipe usually calls for cream)
Directions:

Mix dry ingredients together in a large bowl.  Then add rhubarb and sour cream and gently mix together. 

Turn dough onto lightly floured surface and knead lightly. Then form into a large round shape and cut into triangular pieces.

Brush each scone with an egg wash and sprinkle with streusel before baking in a preheated oven at 375 degrees for 18 minutes.

A photo of the Rhubarb Camelina Streusel SconeHave you ever made scones?  If not I encourage you to try making this recipe or our original basic recipe, it’s so easy and uses cream/sour cream in place of the usual butter. 

(Francine says these scones aren’t exactly authentically English, but that it doesn’t matter because they are good!) :)


To Cobble or To Crisp…

8 Jun
by Francine

I started off on a quest to make a crisp using rhubarb from Village Greens and Elsanta strawberries grown in our county of West Sussex…we didn’t pick them, yet.  (Picking our own will come in a few weeks. For now we rely on the ones we get from the supermarket.)  A photo of the ingredients
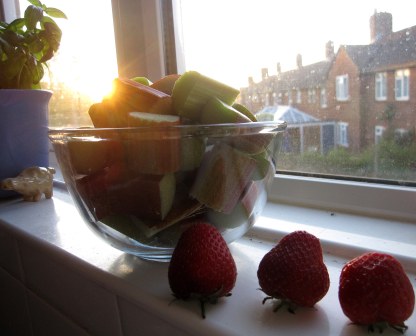
In the end, I made two crumbly desserts…one crisp and one cobbler…both with the same strawberry-rhubarb filling.

I ended up with 2 desserts instead of one because as I was pouring the filling into our tiny (and only) baking dish, I realized that I had too much fruit filling.  So I split the strawberry and rhubarb filling and stored half in the fridge.  Then I continued on with making an oaty strawberry rhubarb crisp.A photo of the crips
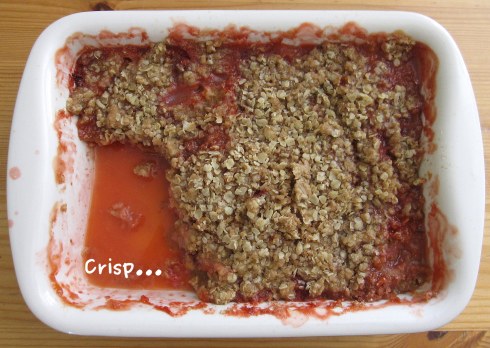
In the morning we had the crisp+some cream for breakfast…:)  It was good…very good.  I like the fact that oats are often used when making a crisp.

That evening I took the rest of the filling out of the fridge. I loosely followed this recipe to make a cobbler, but I used spelt flour instead of all purpose flour.  The cobbler was also tasty, especially when topped with clotted cream ice cream!

But the question remains…is it better to cobble or to crisp one’s fruit filling?A photo of the cobbler
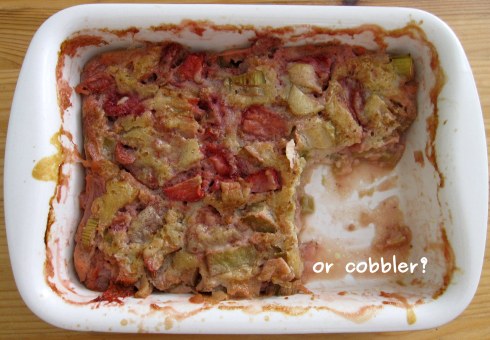
For me, the answer is…crisp that fruit up! 

The crisp allowed the fruit to stay juicer, while the cobbler made the fruit a bit milky.  And I like oats and you can pile them on a crisp.  I think cobbler may suit a blueberry or peach filling better than a chunky rhubarb strawberry filling.
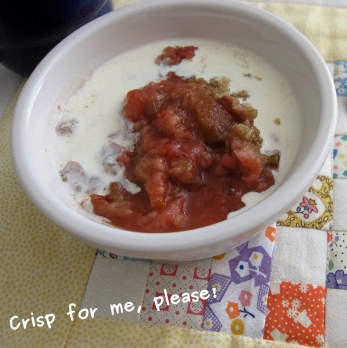
A photo of crisp and creamBut I should mention that when I was a teenager I made cobbler using a recipe from a dusty cookbook written by an Iowa mom, and I loved how it turned out.  The cobbler recipe I followed yesterday didn’t feel familiar.  So I’d like to dig out that old recipe and give it a try to see if I can recreate the tasty cobbler of my youth.

How about you?  Do you prefer a fruit cobbler or a fruit crisp?  You could get really crazy and try an English fruit crumble, which is pretty much just a less sweet crisp minus the oats plus more flour. (Here’s an article praising all three desserts.)

Whatever you prefer, all three desserts are a great way to enjoy the fruits of summer!

I followed Ina Garten’s recipe to make the crisp topping, but I found proportions for the fruit filling to be too sweet.  Below I share the less sweet fruit filling I created. It makes enough filling for one 9×13 baking dish or two smaller baking dishes, which is what I did to end up with one crisp and one cobbler.

Strawberry and Rhubarb Filling

Adapted from Ina Garten’s recipe
Ingredients:
  • 4 large stalks of rhubarb
  • 1 kg of strawberries
  • juice of half an orange
  • zest of half an orange
  • 1/3 cup white sugar
  • splash of lemon juice
Directions:

Cut rhubarb into chunks.  Cut strawberries into chunks.  Mix together in a large bowl along with the rest of the ingredients. 

Use in your favorite crisp, cobbler or crumble recipe!